Computing Services: Email | Software | Printing | VPN | SendFile
MIE VPN (Virtual Private Network) service provides faculty, researchers and students remote access to the internal MIE research network.
The VPN service is a convenient and secure way to access your office and lab desktops and printers from home or while travelling with your portable computer. When your remote computer successfully connects and authenticates to the VPN service, it will become part of the MIE research network as if you were in the department.
(Note to MIE Departmental Staff: This service does not give access to the MIE Administrative network.)
Jump to:
Requirements
Windows, Linux, Unix or MacOS X computer system.
Internet connection. Note: Some public networks (e.g. libraries, internet cafes) might block VPN connections.
MIE user login and password (same login as for your @mie.utoronto.ca email account). Strictly required for MIE VPN.
You need to install the VPN software on your home PC or laptop.
Installation
MIE VPN is based on the open-source OpenVPN software, with customized settings to connect to the mie.utoronto.ca network.
Installing MIE VPN for Windows
- Download and install OpenVPN from the following website:
OpenVPN Community OpenSource Downloads
Choose a release version. Example: “OpenVPN 2.5.7” (“Beta” versions might not have been tested to work with MIE-VPN).
Download the “Windows 64-bit MSI Installer“. - During installation, use the default settings and allow permission to install software, drivers and virtual network device.
- Click here to download MIE VPN configuration file.
If asked for Username and Password to download, use your MIE username (e.g. jsmith) and your MIE password.
– Save the file in a temporary folder, on your Desktop or Downloads folder. - Import the configuration file to OpenVPN.
– Right-click the OpenVPN GUI icon in the Windows system tray and choose “Import”, “Import File”.
– Select the MIE-VPN configuration previously downloaded.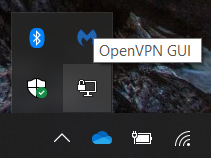

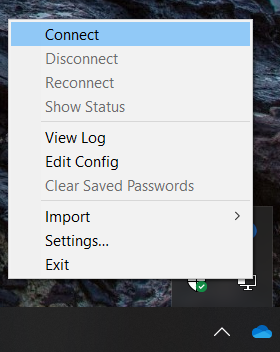
- Right-click “OpenVPN GUI” icon in the Windows system tray again, and click “Connect” (if you have multiple VPN configurations, select “mie-vpn” then “Connect”).
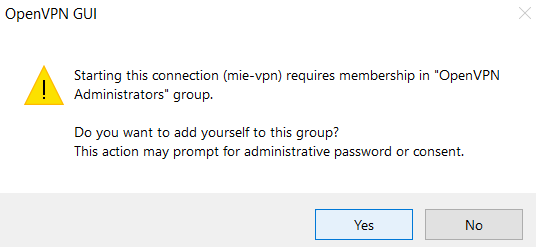
- If your Windows user is a non-administrator account, the first time you connect you will be asked for confirmation to be added to the “OpenVPN Administrators” group. Click “Yes” (this is required for the VPN connection to work for non-admin users)
Installing MIE VPN for Mac OS X
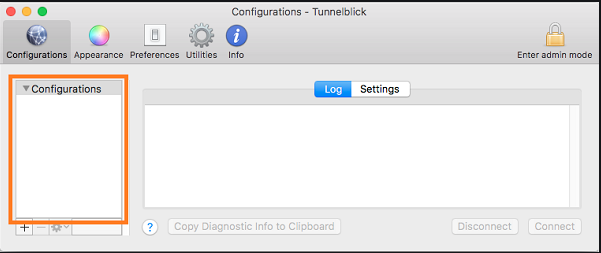
- Download and install Tunnelblick VPN program from the following website: tunnelblick.net
- Launch TunnelBlick from the Applications folder. A TunnelBlick icon should appear in the Status Bar at the top of the screen.
- Click here to download MIE VPN configuration file.
If asked for Username and Password to download, use your MIE username (e.g. jsmith) and your MIE password. - Drag the MIE VPN configuration file to the TunnelBlick Configurations window:
Installing MIE VPN for Linux
- Install OpenVPN software from your Linux Unix distributor (e.g. “openvpn” and “network-manager-openvpn-gnome”).
- Click here to download MIE VPN configuration file.
If asked for Username and Password to download, use your MIE username (e.g. jsmith) and your MIE password. - Open the Linux desktop network manager, “Add VPN”, “Import from file…” and open the MIE VPN configuration file.
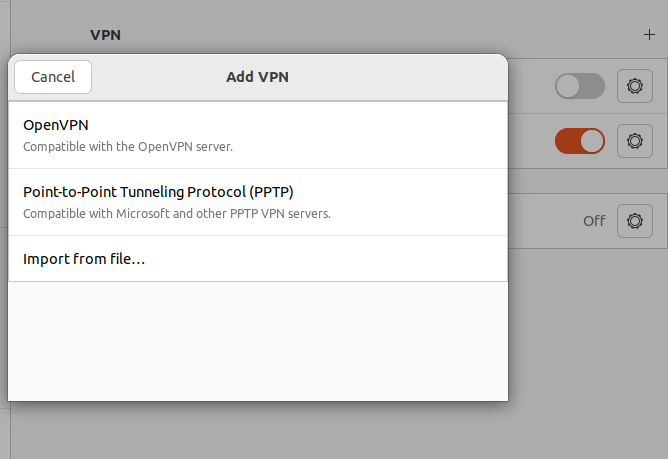
For Linux servers without desktop network manager, save the MIE VPN configuration file in the openvpn configuration folder. The folder location might be specific in your distribution, but it is usually /etc/openvpn
Connecting to MIE VPN
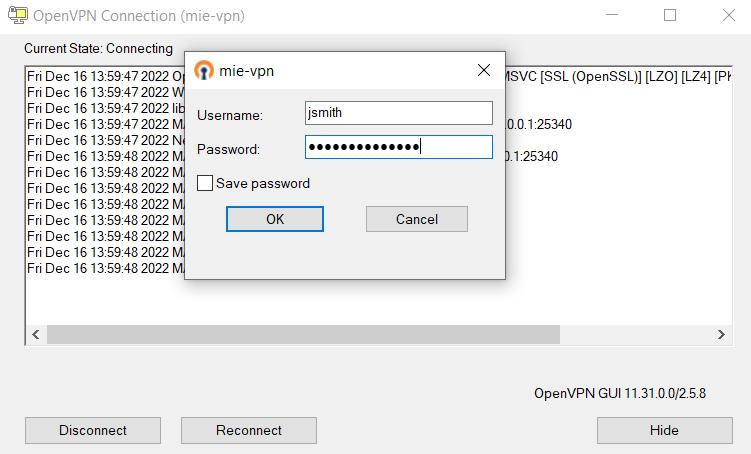
After installing the MIE VPN software, simply run the program. You should be prompted for Username and Password. Type your MIE user login and password (same login as for your @mie.utoronto.ca email account).
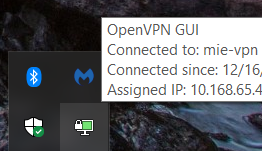
After a few seconds you should get confirmation that the connection was successful. Now you should be able to reach your lab/office desktops and printers.
Test: The following link will tell you if the connection to MIE VPN was successful. The test should say “You are successfully connected to MIE VPN” – otherwise, something went wrong.
Click here for connection test
Connection Example for Windows
- Right-click the OpenVPN GUI icon on the Windows system tray.
- The VPN program should prompt for Username and Password. Type your MIE user name and password.
- After a few seconds the connection should be ready. Note that the system tray VPN network icon turns green.
- To disconnect, double-click the OpenVPN system tray network icon, and click Disconnect.
Connection Example for Mac OSX
- Start up the Tunnelblick Application. It might ask for your Mac administrator password.
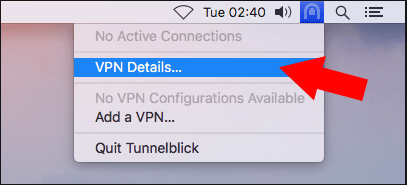
- Once Tunnelblick is running, there should be an icon on the right side of the menu bar. Select Connect ‘mie-vpn’ from the Tunnelblick menu to connect to MIE VPN.
- The Tunnelblick program should now prompt for Username and Password. Type your MIE user name and password.
Connecting to your MIE desktops and printers
After a successful connection to MIE VPN, you should be able to connect to desktops, printers and other networked machines on the MIE network. For example, by connecting using Remote Desktop, Virtual Network Computing (VNC), File Sharing, etc.
You would need to know the IP address of the office or lab computer that you wish to access, before you try remote access. The IP address should be four numbers, such as 192.168.#.# or 128.100.#.#.
- Windows: Open a Command Prompt window (Start – Run – “cmd”) and type the command “ipconfig”.
- MacOS X: System Preferences – Network
- Linux/Unix: “ifconfig” command.
Hint: Check the network settings and test the connection while you are still in the department, before you go home or away. If you can establish connection between two computers in the department, it should also work remotely through the VPN.
Note: Most desktop computers in the MIE network have “dynamic IP address” which means that the IP address may change from time to time. However, the IP address should remain the same for as long as the computer is running. In most cases, the same IP address is reassigned when the computer is restarted. If your computer is changing IP address often, contact us if you wish to have a permanent, static IP address (not recommended for portable computers).
Important: Make sure that your computers are password protected!
Example: Windows Remote Desktop connection
You want to access your MIE office PC (OFFICEPC) from home (HOMEPC) using Remote Desktop connection.
In OFFICEPC:
Note: Remote Desktop service requires “Windows Professional” or better. “Home Editions” of Windows do not accept Remote Desktop connections.
- Make sure that passwords are needed to login to Windows. Otherwise anyone could access your computer!
- Check in “Control Panel” – “User Accounts”.
- Assign strong passwords to your Windows account and for every user of the computer.
- Enable Remote Desktop: Control Panel – System – Remote tab; in the Remote Desktop section, “Allow users to connect…”
- Check IP address: Start – Run – “cmd”. Type the command “ipconfig”. Example: “Ethernet Adapter, IPv4 Address: 192.168.15.250”
Test the connection from another computer in your office or in your lab (for example LABPC2):
- Start – All Programs – Accessories – Communications – Remote Desktop Connection
- Remote Desktop Computer: “192.168.15.250” (the IP address of OFFICEPC)
- You should see OFFICEPC’s logon screen. Logon to Windows as you normally do.
- You should have full control of OFFICEPC.
- If the connection fails, double-check settings, check if a software firewall is blocking, etc
In HOMEPC:
- Install MIE-VPN software as described earlier in this document, if you haven’t done so.
- Connect to MIE-VPN and use your MIE login and password to connect.
- Optionally but recommended, test the VPN connection.
- Run Remote Desktop Connection the same way you did from LABPC2:
- Start – All Programs – Accessories – Communications – Remote Desktop Connection;
- Remote Desktop Computer: “192.168.15.250”
- Logon to OFFICEPC. You should have full control as if you were in the office.
Example: Mac OS X access to shared folders
You want to access the shared folders on your office Mac OS X desktop (“Office Mac”) from your home Mac OS X computer (“Home Mac”).
In “Office Mac” :
- Set up File Sharing in Systems Preferences – Sharing.
- Add the folders you wish to share.
IMPORTANT: Make sure you are the only user allowed to access the shared folders. Remove access from everyone else. - Find out the IP address of the computer, in System Preferences, Network.
Example: “IP address: 192.168.15.251”
In “Home Mac”:
- Install MIE-VPN software as described earlier in this document if you haven’t done so.
- Connect to MIE-VPN. Use your MIE login and password to connect.
- Optionally but recommended, test the VPN connection.
- In Finder, in the Go menu, select “Connect to server”
- Type the IP address of “Office Mac”. Example: 192.168.15.251
- You should be prompted for your “Office Mac” password and if successful your folders are displayed.
Example: Network printing from wireless laptop
Problem: Your laptop prints to a network printer while connected to the (wired) MIE network but can’t print when you connect to the UofT wireless network, nor from any other network.
Solution: Install and connect to the MIE-vpn. No other changes are needed; printing will work while you are connected to the MIE VPN.

